|
|
Alan's
robot page |
|
|
|
Alan's
robot page |
|
| Latest news: It has been a long slow process getting this to work, but it is now finished :-) Well, finished is probably over stating it, there is still plenty of room for improvement and it is not yet very reliable - but it has now successfully collected and delivered many drinks.......... See a video of the robot collecting a drink -------> BTW - Ben Heck is the real master of building things like this and his show introduced me to the Arduino without which this would be impossible for me to even consider doing. |
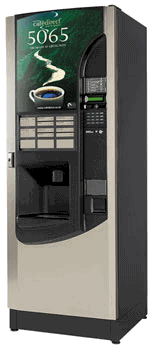
| How it all came about: For a long time now I had fancied the idea of having my own hot drinks vending machine (not sure why ;-) but it was only recently I spotted one on eBay which was not only a reasonable price but they would deliver it, I put a cheeky bid on, fully expecting it to go for stupid money. Next think I knew I had bought it !!! Little did I know that this was going to be just the start of this whole new route of stupidity............ Soon after getting this machine working and installed I had the idea that if I fitted an RFID to the underside of my mug I could by using an Arduino with RFID reader and a bit of circuitry (i.e. a couple of mux chips) get it to to control the keypad on the vending machine so just by putting my mug into the machine it would recognise the mug and dispense my drink without my having to press any buttons.. This I did, but with this feature it gave me my silliest idea yet which I eventually just had to have a try at as it was just such a tempting project - this idea being that if a robot could collect my mug from me and take it to the machine, all it would have to do is place the mug into the vending machine and my drink would be dispensed, the robot could then bring the drink back to me..... |
 |
| Building
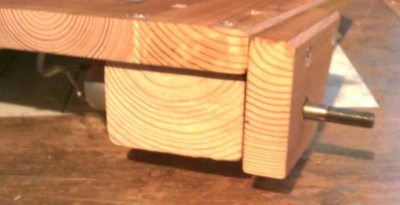
the robot: First problem I had was the minor detail that I have no experience whatsoever with building or programming robots and I had no idea where to start, so I decided that the best thing to do would be to build myself a very basic 3 wheeled robot of some kind just to get myself some experience on what is involved. As with all my projects I was determined not to spend a lot of money on this, especially as I thought it VERY unlikely I would ever be successful or even if it was possible at all? So I ordered a couple of cheap motors and put together a very basic three wheeled base using whatever wood/metal I had in stock and started adding bits to it. To control the motors I built a simple "H bridge" type circuit using a couple of relays and used a couple of transistors to switch the power feeds to these so I could use PWM to control the motor speeds. I put Ultrasound range finders on the front and sides (these are just £2.50 each). I decided to fit an LCD display as I figured this would make programming it easier as it could display what it was doing etc. The drive motors are not very big so I made more heavy duty axles for the wheels to attach to as I expect this robot will be carrying more weight than the motors alone could take, I cut out a couple of wheels from plywood, fitted a caster on the back and it was ready to start experimenting with........ Update: I have now put the front ultrasound sensor on a servo so I can move the direction it points, this should help a lot as i can look at the wall in front from 2 directions and thus tell if it is square on to the wall or at an angle, it should also be able to swig it 90 degrees either side and do the same for a wall at the side of the robot . cost so far = around £100 - Arduino mega £16, ultrasound sensors £7.50, motors £12, misc electronics £10., caster £6.50, universal joints £13, remote control £9, lcd £5, servo £2.50, 5ah 12v battery £16. |
  |
   |
| Controlling
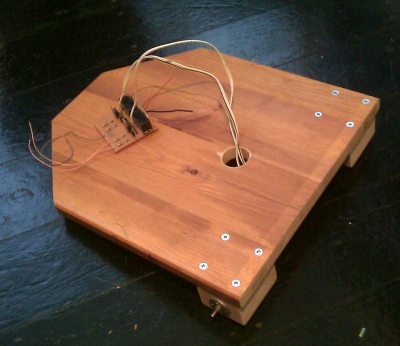
the robot: Once I had built a robot then the difficult part starts - trying to program it to do what I want - I am using an Arduino mega as controller (more info HERE) I am not a programmer and have no experience of doing anything like this before so there is no way I could try and write some kind of artificial intelligence program or anything, so it has to be as simple as possible. My first thoughts had been to paint a line on the floor for it to follow but I didn't really want lines all over the place and after looking at this idea on the internet it didn't look like it would be as easy as I had hoped anyway to program this. My next thought was to have infra red LEDs on my walls at strategic points and the robot just has to move towards the light, but I didn't fancy the idea of all the wiring and mess this would involve. I also considered magnets/wires etc. under the floor that it could follow, this was a possibility but I thought for starters I will just see what I can get it to do just using the three ultrasound sensors. (how these work can be seen HERE). As it turns out, these almost turned out to be all that is needed, I am navigating round with very simple instructions such as move forward until 30cm from the object in front, turn left.......... If everything in the room was perfectly flat/square with no odd angles and strange shapes, no objects being moved and no doors being opened or closed etc. then this would be easy, but as I soon found out, programming a robot to navigate the real world is a very different proposition.. Also you have the problem that the robot may drift sideways when moving forward or a wheel may slip all of which throws out any attempts at navigation. I also soon found out that the ultrasound can't be relied on in some situations as if at an angle from the thing in front or other things around giving reflections you can get no signal or even worse a false signal. After much experimenting I decided I needed more and so made a sensor to detect movement along the floor using an old PS2 optical mouse. This hangs below the robot so as to slide along the ground and the signal from this can tell the robot not only how far it has travelled but also how far it has turned. This again is not perfect in the real world but is good enough to give some additional help in navigation. Just need to spend a lot of time now learning how best to do it. The main "breakthroughs" I have found is the idea of running for a small distance and comparing distance measurements to make sure it is running parallel to a wall, if not make a slight adjustment. The other trick is to have it try to follow a wall if one is available (this can be seen working as it goes into the second room). My code for doing these still requires some work to get it right but they are already working well enough to help a lot. I have now fitted a ball caster on the back which has helped a lot as the caster I was using was throwing it out of alignment and upsetting everything. I also modified my sketch to apply low power to the motors for a short while before applying enough to move the robot, the idea being this will take up any slack in the motor drive - this has made a big difference :-) I had a lot of trouble with the PS2 mouse keep stopping working resulting in the robot going out of control, I think this was a problem with the timed interrupt I use and so I have just modified my sketch to turn off this interrupt when using the mouse, so I am hoping this is now resolved? For anyone interested, the latest version of my program can be seen HERE |
| Controller: I bought a simple 4 button radio remote to use with the robot, so I can tell it when I want it to come and collect my cup etc. and then a friend gave me the idea that it would be fun to have a bell to ring to call the robot, so I have built the controller into the control panel here ---> There is a microswitch attached to the bell so the plan is that when I want a drink I ring the bell, the robot will then come into the room to collect my mug, take it to the vending machine, get it filled and then bring it to me. |
 |